Thursday, March 31, 2011

Tea Party part four

After the girls crafted and cookied we sat down and read Tea for Ruby. They loved it! I was a tad worried they would like this part but my Zoe Bug is a big book lover and I wanted to do that for her. Luckily they all seemed to enjoy it. Another reason I wanted to read Tea for Ruby is because is taught tea party etiquette. How to sit, say please and thank you, great your guests (which I totally had Zoe do for each and everyone of them- and she had to take their coats and place them on her bed- along with the moms...so sweet) anywhosit...so on and so forth with the etiquette.
After the story each girl found their flower and took their seat. And they proceeded to stare blankly at the table. They had no clue what to do...it was funny. My mom and I got them started on their tea. Slowly but surely they all dove in. Here is what was on the menu...

Three kinds of tea with sugar cubes

Strawberry scones

Maple cinnamon scones

Mini cinnamon sugar muffins

Mini cookie sandwiches dipped in sprinkles

Carrot sticks- for good measure (;

PB & J cut out with heart shaped cookie cutters

Fruit cups

Mini Cupcakes

and peanuts...the only request from the birthday girl herself!


Some girls ate ok, but for the most part they picked and didn't really eat. But it was still just so pretty. I used my moms antique tea cups (her idea not mine!) and set everything out on glass platters. It was just so lovely.

I should add that nothing got broken until hubby was driving the tea cups and tea pots back to Moms house...something must have shifted and part of one of the tea pots broke off. I. Felt. Horrible!

Wednesday, March 30, 2011

Tea Party part three


I decided to do something crafty for Zoe's party and since we were taking cute teacup photos of each girl. Painting a frame seemed to make the most sense! So, I threw some of Steve's t-shirts over their party outfits and got them all painting! What a beautiful mess! I only used pink, purple, blue, and white paint. This way no matter how much mixing happened they would only end up with a shade of purple instead of brown. You could also do combos like red, yellow, orange, and white or green, blue, yellow, and white...so on and so forth, but you get the idea. As the girls finished painting I had coloring pages and activity sheets for them to work on while they waited.

After painting I sent the girls to the bath room to wash their hands and moved all the painting supplies and frames to the counter. Rolled up the plastic table cloth and set out mini flower shaped cookies. The table cover was the trick here...all of this happened within minutes! Of course having names on plates and cookies pre-bagged didn't hurt either. Once the girls were back I showed them how to squeeze a large amount of frosting from a tube onto a cookie and sandwich it together. Then we dipped the edges in sprinkles and put them back in the bags. I added a label to the top with their names so they could have a treat for later. I actually did this largely due to the fact that I baked 150 mini cookies for tea and needed to do something with the massive amount of leftovers!!! If your curious here is the cookie recipe I used... it is a favorite!

I would say both these activities went over really well! Only one tiny blue speck on my wall...but that is why I used washable paint!

Tuesday, March 29, 2011

Tea Party part two

I organized Zoe's party down to the last minute. My house was not big enough to have 7 girls running willy nilly through the halls! When each girl arrived I had her pick out a party hat and "pearl" necklace. I strung the beads together myself with a box of beads I found at Micheal's. I used a 40% off coupon making this a really inexpensive favor for the girls to take home. About $0.80 per girl...or so. I also added a pretty pink satin ribbon to each one. For the party hats I went to the dollar store and bought a package of shiny metallic looking hats and recovered them in the paper I was using for the party. The paper? I bought a pack of scrapbook paper, and once again using a 40% off coupon I got 160 sheets of coordinating paper for around $12. You will be seeing this paper on everything! I also added a crepe paper fringe around the bottom of each girls hat, and for Zoe I added a fancy "6" and pom pom on the top. After the girls had their hat and pearls on I had them sit in front of a giant teacup made of foam board and scrapbook paper and took their picture! I had Steven get the pictures developed within an hour so each girl could take it home at the end of the party! This was his one and only job! The pictures turned out SO great! This was a favorite of the Mom's too ;)

Monday, March 28, 2011

Tea Time part one


My Zoe Bug just turned 6 a little over a week ago. How did I become the Mother of a 6 year old!It baffles my mind every time I think about it! For her 6th birthday we threw a party for her and 6 of her school friends. But not just any party....a tea party! I decided to make it a big girl party and not a princess tea party... I have a huge belief that there is more to life when your little than just pink princess crap. And guess what folks? SHE LOVED IT!
One of the party favors was a tiny vase and flower. The vase? A cleaned out syrup bottle from Cracker Barrel! Then just tied a small tag on with their name to be used as a place card. I did this to stop any argueing about who gets to sit by who. Worked like a charm.

Wednesday, February 16, 2011

Embroidered Butterfly


I recently taught Zoe how to embroider. She absolutly loved it too. I let her draw a picture and I transferred it for her. She sat for four hours on one of her many snow days and stitched and stitched until her butterfly was all done. We are trying to decide what her pretty buterfly will become... a pillow? an applique? a doll blanket?

Tuesday, February 15, 2011

Play Ball...in style!

I recently made up a couple of tie shirts for a friend. Her nephews are children of some big baseball fans. I was lucky enough to have just a bit of baseball fabric leftover from Steve's jammie pants I made him last year. I even have just enough left for a shirt for Hayden.

Monday, February 14, 2011

Happy Heart Day!

We celebrated our Valentine's Day yesterday because Steve won't be home till late. So yesterday morning we started the day with a heart shaped pancake breakfast! Heart shaped panckaes are actually very easy to do. Just pour the batter into the pan in a "V" shape...it forms a heart from there. Add a little food coloring and you can even have pink heart shaped pancakes!
And of course this morning for a little special treat I made cinnamon rolls...from a can :) But I did reroll them into a heart. I saw this around blogland somewhere.And finally, Zoe's heart shaped lunch. Did you know about this whole molding hard boiled egg thing! It's pretty cool. I found the idea here!

Sunday, February 13, 2011

Valentine Box

I couldn't find a box to buy to make Zoe's Valentine box for school. I didn't have a shoe box we could use either. So, I am standing in the kitchen thinking to myself, "what on earth can we use???hmmmm" And it hit me...the ginormous goldfish cracker box. Sweet! Here's what I did...

Completely open the top and clean out crumbs with something damp...I use a cleaning wipe...
Wrap the box with wrapping paper...Neatly fold the paper on the bottom so that it still sits flat...On the top be sure to carefully fold paper over and tape down...Gently fold box top back together...Staple top back together...Using an exacto knife carefully cut square into paper only and fold down...Next carefully cut into box to form flap...be sure to leave the bottom uncut...Tape paper onto flap...Decorate until your hearts content...Done!

Wednesday, February 2, 2011

Pebble Puzzles!

I have no idea what this blog says. It was linked to from a blog from another blog. After following several links this is where I ended.

Picture and idea found at Zelnice.
I love this idea. Love love love it! I have plans to make a set...a big set! Plus a bag to put it all in. More ideas for this can be found here and after googling "pebble puzzles" I am thinking this is a fairly fresh idea? Either way.... if you didn't hear the first time... I LOVE it!

p.s. We missed most of that big bad ugly winter weather! And still are having 2 snow days! Seems like we were at the very edge of snowpocalypse! How's your winter treating you today?!

Sunday, January 23, 2011

Tote-A Bag-A *revisited*

Zoe attended a birthday party this weekend. I decided the book loving birthday girl needed a library tote bag. The pocket on the front is for a library card. I'm thinking since she rushed through most gifts but stopped to squeal about her new bag and book that it was well liked! I also got a big thanks for the mom. Apparently they go to the library each Monday and check out 14 books for the week...this little girl seems to like books even more than my little reader! If that is even possible!

The following is from the original post I wrote when I made Zoe's library tote bag.

***********************************************

I sewed up Zoe's Library Tote Bag last night. She found it this morning resting on a door knob with her library books inside. I think she really likes it! Now Mommy won't have to juggle keys, wallet, books, and a certain little 2 year old all the while trying to walk down the library stairs anymore! I didn't use a pattern. I just pulled out a really big children's book and added a couple of inches in every direction then cut out two in the ABC fabric and two in the stripy fabric. I sewed up the sides and bottom on each stuck the liner in and turned down a hem added the padded handles and sewed around the top of the bag. If you noticed I turned the ABC fabric down a bit further than the other so the stripy would peak out over the top. If any of this makes sense to you you must have some sewing knowledge. If it doesn't then I am truly sorry you read my ramblings...lol. I should have taken pictures as I was making it...ahhhh live and learn.
Tote-A Bag-A... that's Zoe lingo for Tote Bag!

This post has been added to and was origianlly posted on My Zoe Bug on 9/14/07.

Saturday, January 22, 2011

Crocheted

Have you seen all the amazing crocheted rocks all over? Here or Here! I love the idea of taking items out of nature and enhancing them like this!
But here was my dilemma, I didn't want to buy my rock...I wanted to find one. Being smack dab in the middle of the U.S.A. we don't get to too many areas that might have these rounded lovelies. So my rock is square-ish.
(front)
We have been heading to Osage Beach for a couple of summers now and we collect rocks when we spend time at the lake. Zoe has no sensor when it comes to this, so I have to make some last minute decisions when bringing them home. I plan to make a place for the rocks, stones, shells, etc. we collect throughout the years. But, displaying them with a 2 year old in the house right now , to me, is not a very bright idea. Hmmm...I got off track. Where was I? Oh yes, my square-ish rock. I simply made the best of what I have and guess what?!
(back)
I think I love it!
The crochet thread was given to me after my Great Grandmother passed away. I have more and am now thinking I may need to add crochet to other items....pillow cases, napkins, driftwood?!?!

I participate in Simply Designing's Link Party

Friday, January 21, 2011

Happy Hearts to You! *revisited*

I first posted about these cookies on Valentine's Day in 2008. This recipe is still a favorite. Here we cut hearts and made frosting sandwiches then dipped the edges in Valentine sprinkles. I can't say enough good things about this cookie recipe. I am not a fan of the traditional cut and decorate sugar cookie...to hard. These stay softer and taste great without being too sweet....of course that is taken care of when smothered with frosting and sprinkles :)The cookie recipe can be found here. This post has been reworded and was originally posted on My Zoe Bug on 2-14-08.

Tuesday, January 18, 2011

The Anytime Bunting Pattern

I made a PDF of the shapes I used to create my Valentine's Day bunting and added it here for those who, like me, do not own a do it all expensive cutting machine. Geez I would love to get my crafty little hands on one though! I based the size for this bunting on Vintage Indie's free printable for Valentine's Day and for Christmas, but it can certainly be used anytime! Embellishing these is endless! Not to mention the paper choices out there! Just print the image on 8 1/2 by 11 card stock and cut out the patterns. I made two versions. One has a single point and the other has a double point. Use one or the other or both. If you have any questions feel free to ask! And please note that this is not a fancy schmancy pattern. Nope, just hand drawn.

And if you would rather just spell out a word you can skip printing the images. Again, endless possibilities! Enjoy!

Friday, January 14, 2011

Never too many hearts

When your five as long as it is pink or has a heart on it it matches right? Here is Zoe in her "hearts galore outfit". Her words not mine. She was never more tickled than when I bought the shirt and socks for her. I told her to put her jean skirt on with it and when she stepped out of her room I thought...nope, no way, not my daughter! Let's just say the skirt had finally become too short and the knee high socks where more like thigh high socks! She has been wearing this jean skirt for two years now. I like it because it has the shorts under it so I was determined to get lots of use out of it. Well, in my determination I thought I should just add some pink fabric with hearts on it and then it will last yet another year at least! Woo Whoo! She loves it. I love the length. Daddy approves too. Win win! She is all set for Valentine's Day!
Please note there are hearts on her socks, skirt, shirt, a necklace, and a hairclip made by mommy :)

Thursday, January 13, 2011

Valentine Bunting

I have been seeing a wide variety of banners or buntings all over blogland for such a long time now I figured it was time I jumped on the bandwagon. I had started a Halloween one back in October but couldn't get it finished with everything else I had to make back then. But right now it seemed like perfect timing since I have pretty much nothing on my plate. I found the images of these sweet little vintage valentines on Vintage Indie.After I made up my pattern for all the papers they went together really easily. I added some black glitter around the Valentines and added a little red jewel towards the point at the bottom. I tied it all together with some tiny black ribbon and added the lacy ribbon on the ends for stringing up. I think I love it.

Anytime Bunting Pattern posted here.

Wednesday, January 12, 2011

Handyman Hayden is Two!

For Hayden's 2nd birthday we celebrated together as a family and threw a slightly bigger party for extended family the following week. I decided on a Handyman/construction sort of theme. Here are a few of the handmade items I threw together for his big day.
Invitations- original idea from here. I couldn't get the files to work so I just drafted my own patterns for everything. The paint brush was a favorite of min e because of the "bristles".
Happy Birthday banner-just paint chips with cut out letters, double sticked taped on, two holes punched and attached with string. Easy.
Door sign. I sketched it out from images of constructions signs I found on a google image search, and just added a party hat. This gave pleanty of chuckles to the adults at the party.Tool box party favors. That hold animal crackers just right. I will work up an animal box favor box pattern...soon...hopefully :)
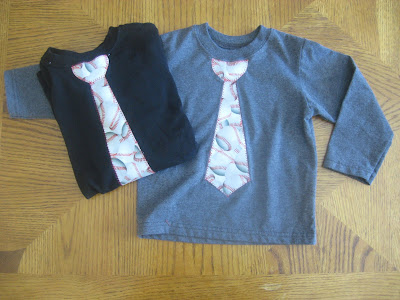
Hayden's "2" shirt and hard hat
The cakes-cupcakes for his actual birthday and a cake for his party. I used Wilton's candy clay recipe for the yellow and green details on his tape measure cake. I also used this Cake Boss frosting recipe...Best. Frosting. I. Have. Ever. Made...yummmm.
I also tied balloons to some cones I found at the party supply store.
All in all I would say this was my favorite birthday party we have hosted. Simple and inexpensive.